Workflows
Table of Contents
- Background
- Workflow Creation Prerequisites
- Creating a Workflow
- Using Bots in Workflows
- Viewing Specific Workflows
- Modifying a Workflow
Background
A Workflow determines how the application's approval process proceeds and who is responsible for managing the application request. A Workflow must be defined when creating a Catalogue Item so must be created before a Catalogue Item.
You can choose between two different Workflows: a default Workflow and a decider Workflow. Choose the one that best suits your Organisation. Remember to give your Workflow a descriptive name to make it easier to find later.
- Default Workflow: In default Workflows, the order of events is flexible and handlers are responsible for approving or rejecting applications. Additionally, there can be reviewers and deciders.
- Decider Workflow: This is a restricted version of the default Workflow where handlers do not have the authority to approve or reject applications. They must request a separate decider to approve or reject the application once the application is ready for a decision.
Workflow Creation Prerequisites
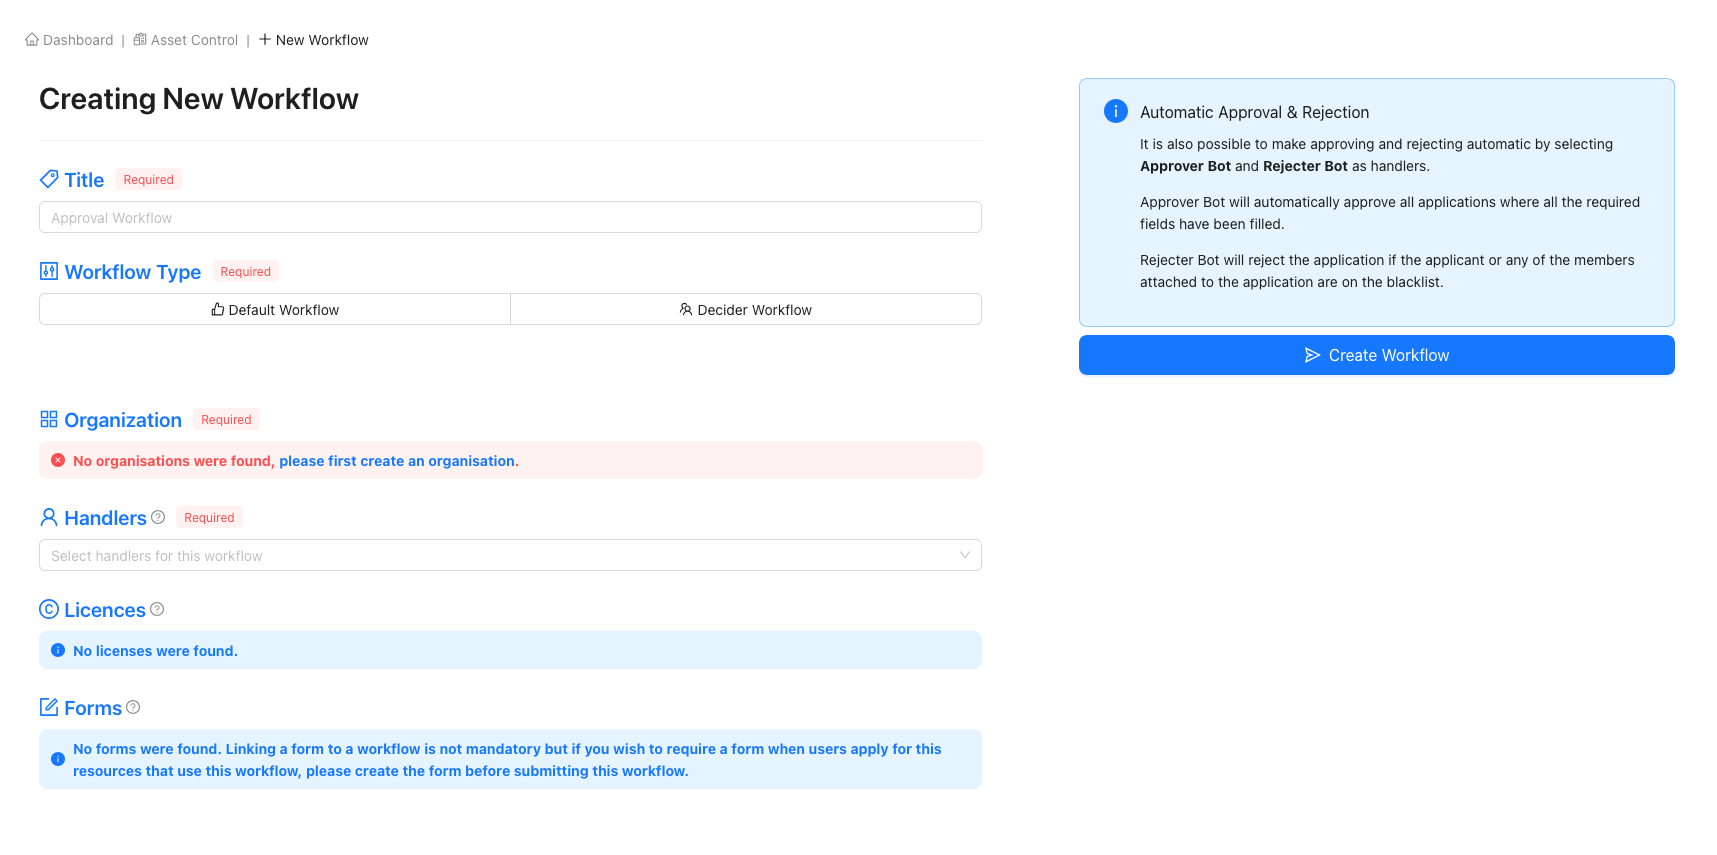
Ensure that an Organisation is created.
If you attempt to create a Workflow as a Platform Owner without first creating an
Organisation, you will receive an error message stating that no Organisations exist,
and you will not be able to create a Workflow.
If you are a Platform Owner and are unsure how to create an Organisation, follow the
Creating New Organisations
guide for assistance.
Creating a Workflow
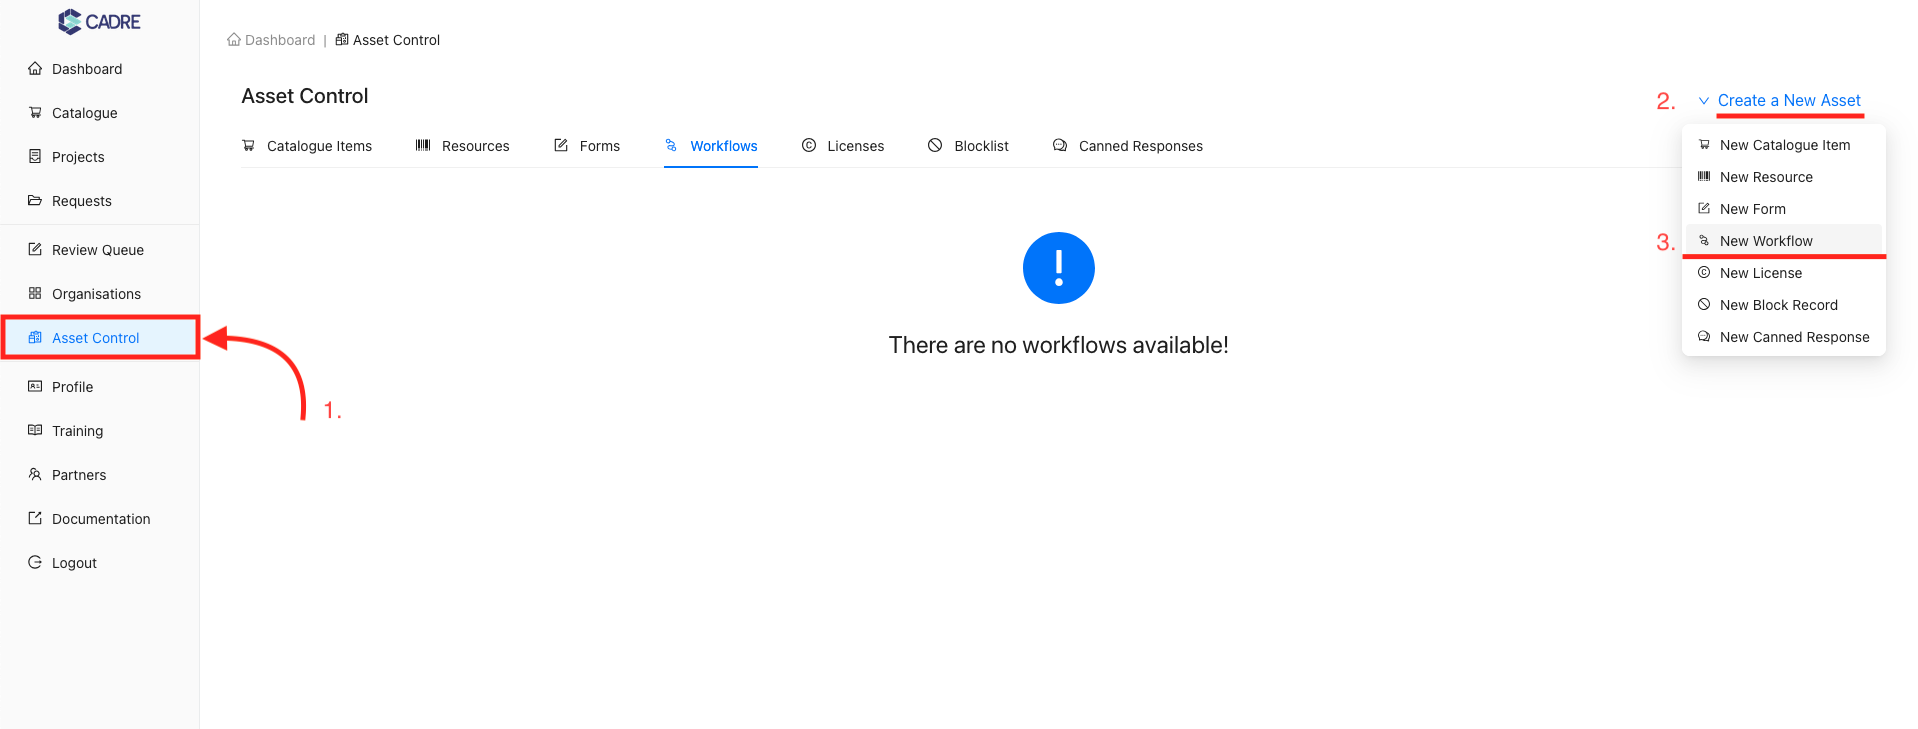
Navigating to 'New Workflow' form
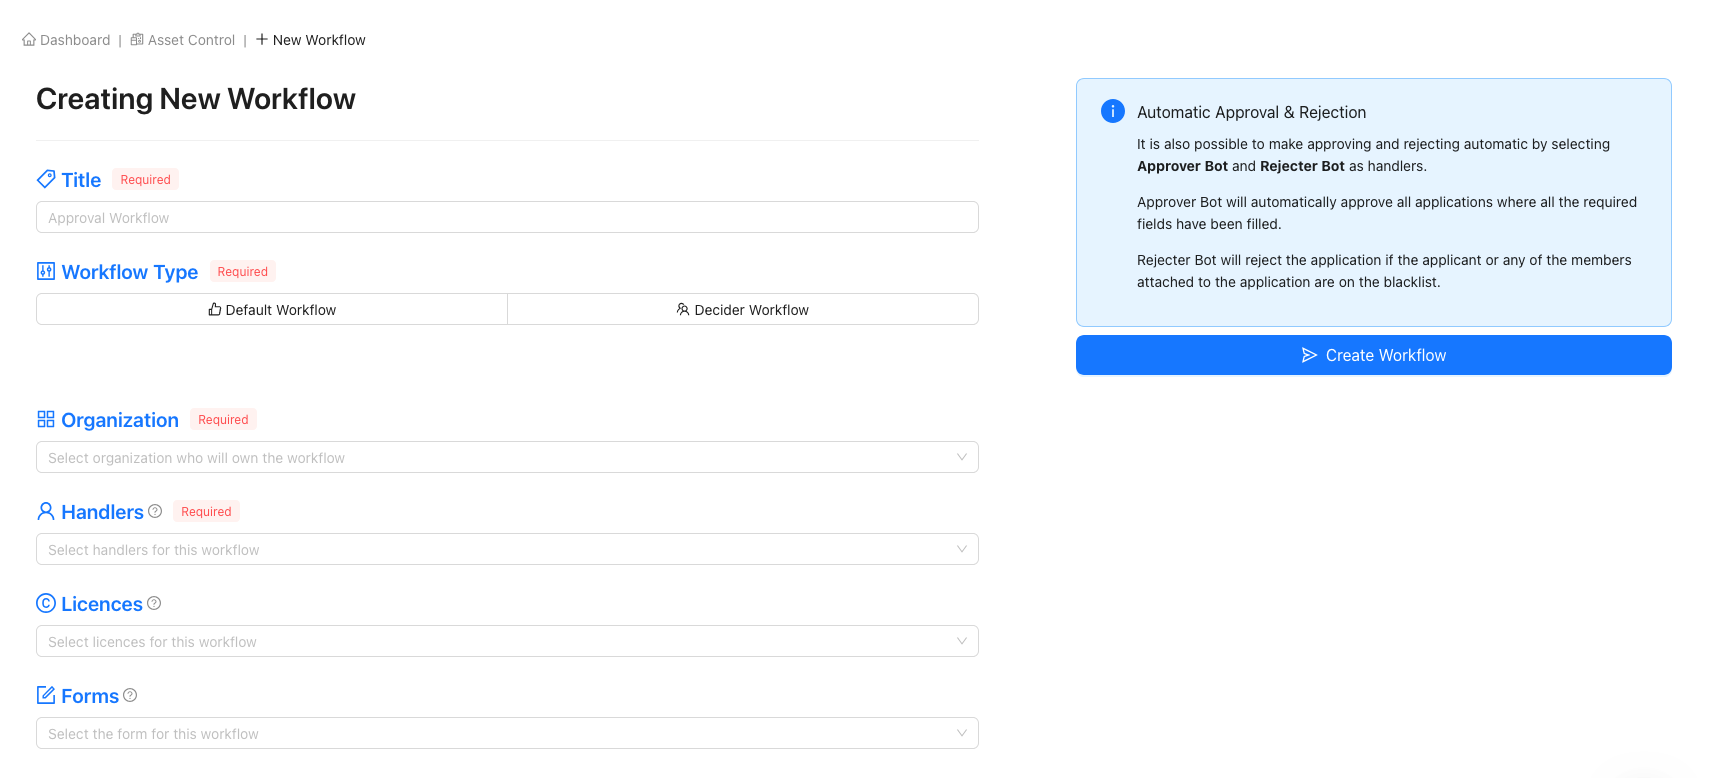
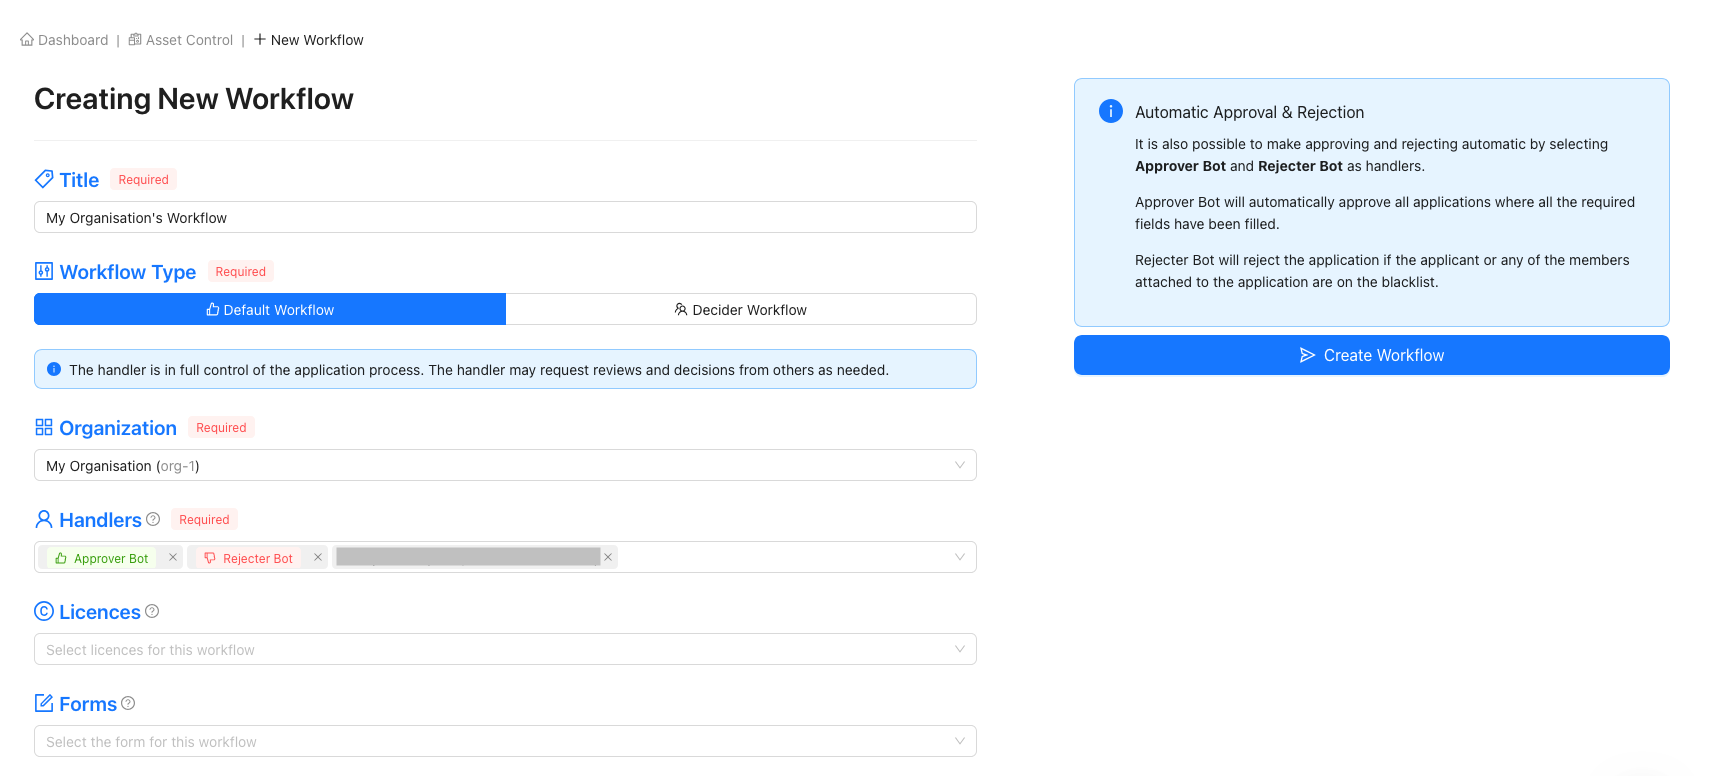
Complete the new workflow form
If you can't see a user to set as a handler
When choosing handlers, you will only see users who have previously logged into CADRE. Ensure that all of your desired handlers have logged in before creating the Workflow.
Setting a Licence or Form
As shown on the Workflow creation page, there is functionality to associate
a Licence and/or Form with the Workflow. The benefit of this is to reduce
redundancy when creating multiple Catalogue Items that share the same Licence(s)
and Form(s) and are managed by the same handlers. If you have a set of Catalogue
Items with the same Licence(s) and Form(s), it becomes more efficient to create
a Workflow with all the required Licences and Forms rather than setting them
individually for each Catalogue Item.
If you are unsure how to create a Licence,
follow the
Creating New Licences guide for assistance.
If you are unsure how to create a form,
follow the
Creating a Form guide for assistance.
Finalise the Workflow
Click 'Create Workflow' to complete the process. You should see a confirmation message indicating successful Workflow creation.


Using Bots in Workflows
CADRE has several features implemented as bots (automatic users), such as handlers that can be attached to a Workflow.
To use a bot, add the bot as a handler to a Workflow when necessary. The name of the bot will be visible to applicants in the event log as the entity that approved or rejected their application.
Approver Bot
The Approver Bot approves applications automatically, unless a member of the application is blocklisted for the applied Resource. If the applicant or any members have been blocklisted for an applied Resource, the bot will take no action and a human will need to handle the application.
Rejector Bot
The Rejector Bot rejects applications automatically, unless a member of the application is blocklisted for the applied Resource. If the applicant or any members have been blocklisted for an applied Resource, the bot will take no action and a human will need to handle the application.
Viewing Specific Workflows
Navigating to the 'Asset Control' page
Using the sidebar, click the 'Asset Control' navigation item to navigate to the Asset Control page. Then, select the 'Workflow' tab to display the tabular view of Workflows.

Finding your desired workflows
In this example, there is only one Workflow, so finding the desired Workflow is trivial. However, if there were multiple Workflows, the table contains filters on each column to help reduce the total number of Workflows displayed.
For example, the 'Workflow ID', 'Title', 'Organisation', and 'Handlers' columns have a searchable dropdown that opens by clicking the magnifying glass icon. Any text provided in this search box will be compared to values within the column, and matches will be highlighted in yellow. Columns with an active search filter will have their magnifying glass icon coloured blue.
![]()


Opening a workflow's page
On this page, you can open the Workflow's page by either:
- Clicking the link on the Workflow name, or
- Clicking the 'Open' button under actions
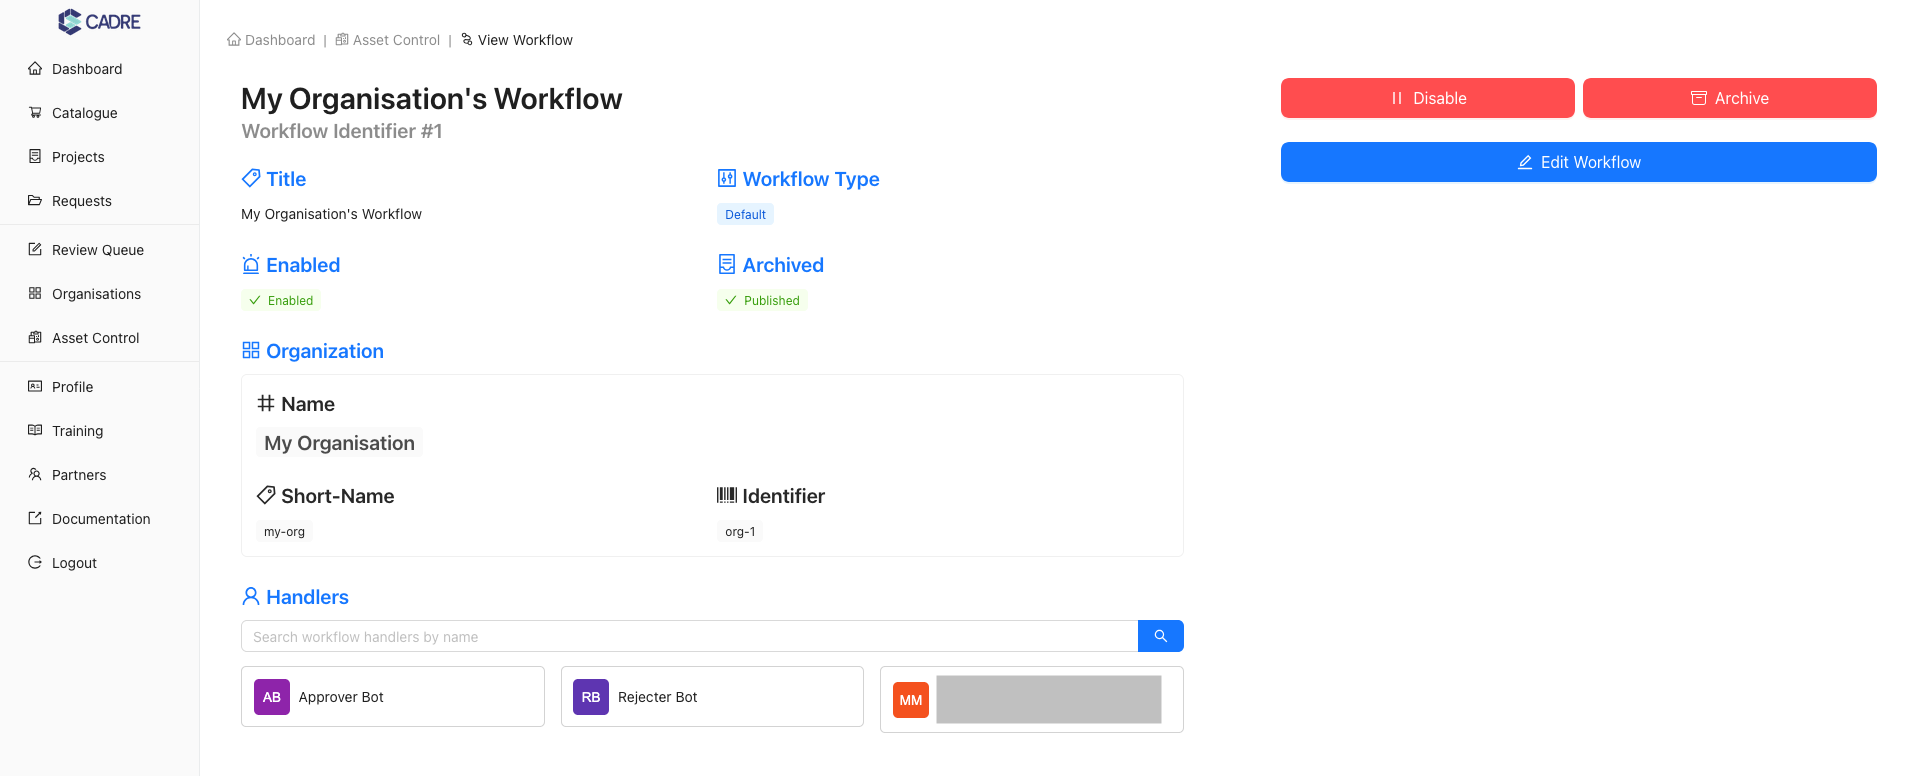
This will navigate you to the Workflow's detailed page.

Modifying a Workflow
Archiving or Disabling a Workflow
Archiving and disabling are both methods of excluding a specific Workflow from further access and reference. This means that the Workflow will no longer appear as an option when defining a Catalogue Item's approval process.
You can archive or disable a Workflow from either:
- The tabular view of all Workflows, or
- The specific Workflow's page


Editing a Workflow
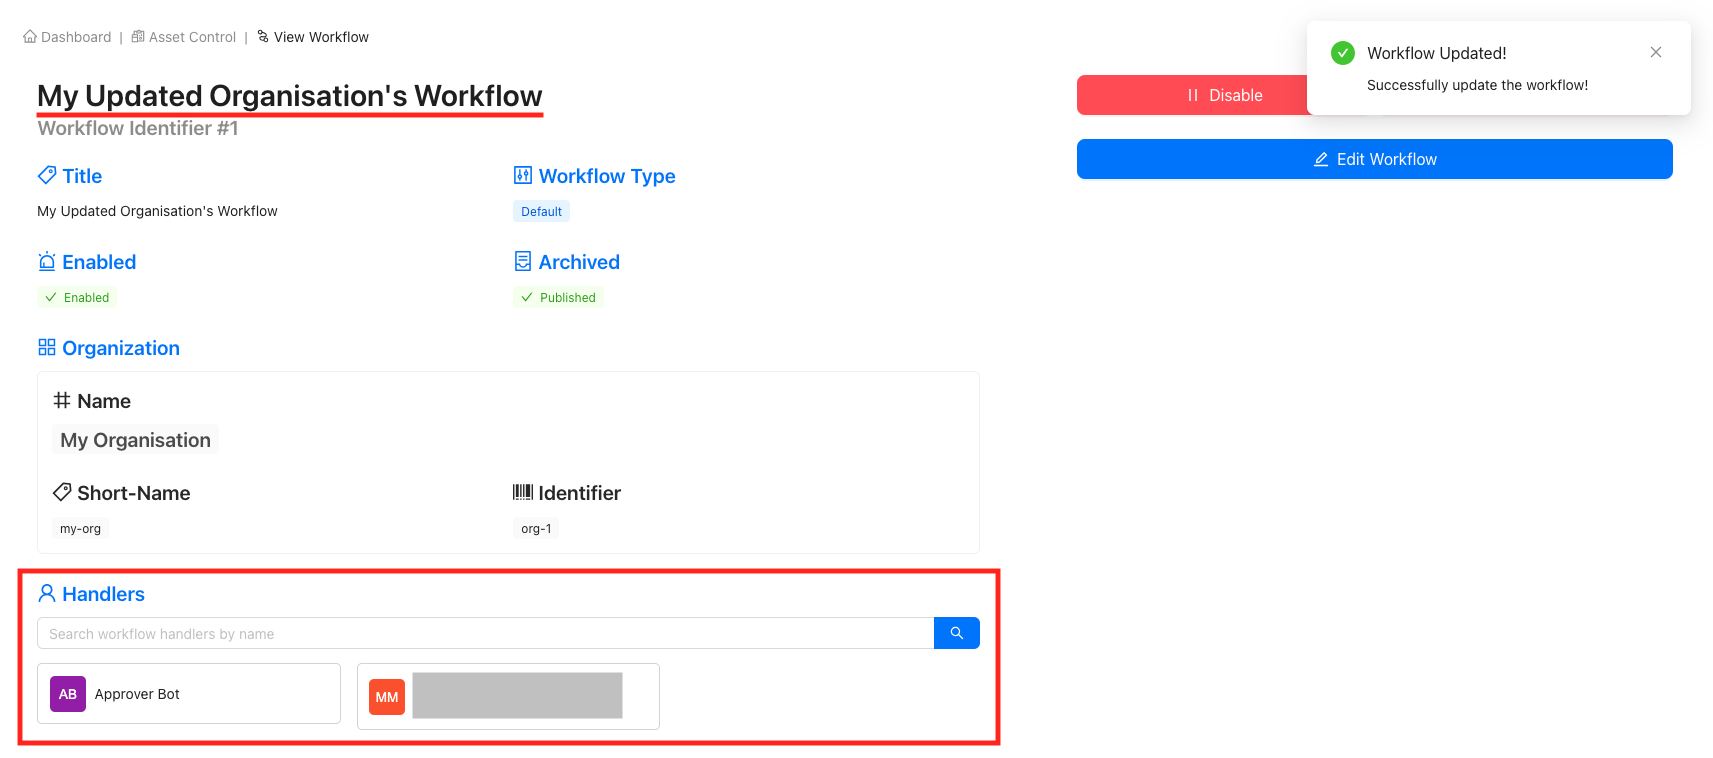
The only details that can be modified within a Workflow are the title and the handlers who will manage the application requests. Follow the steps below to modify the title and handlers within a workflow.
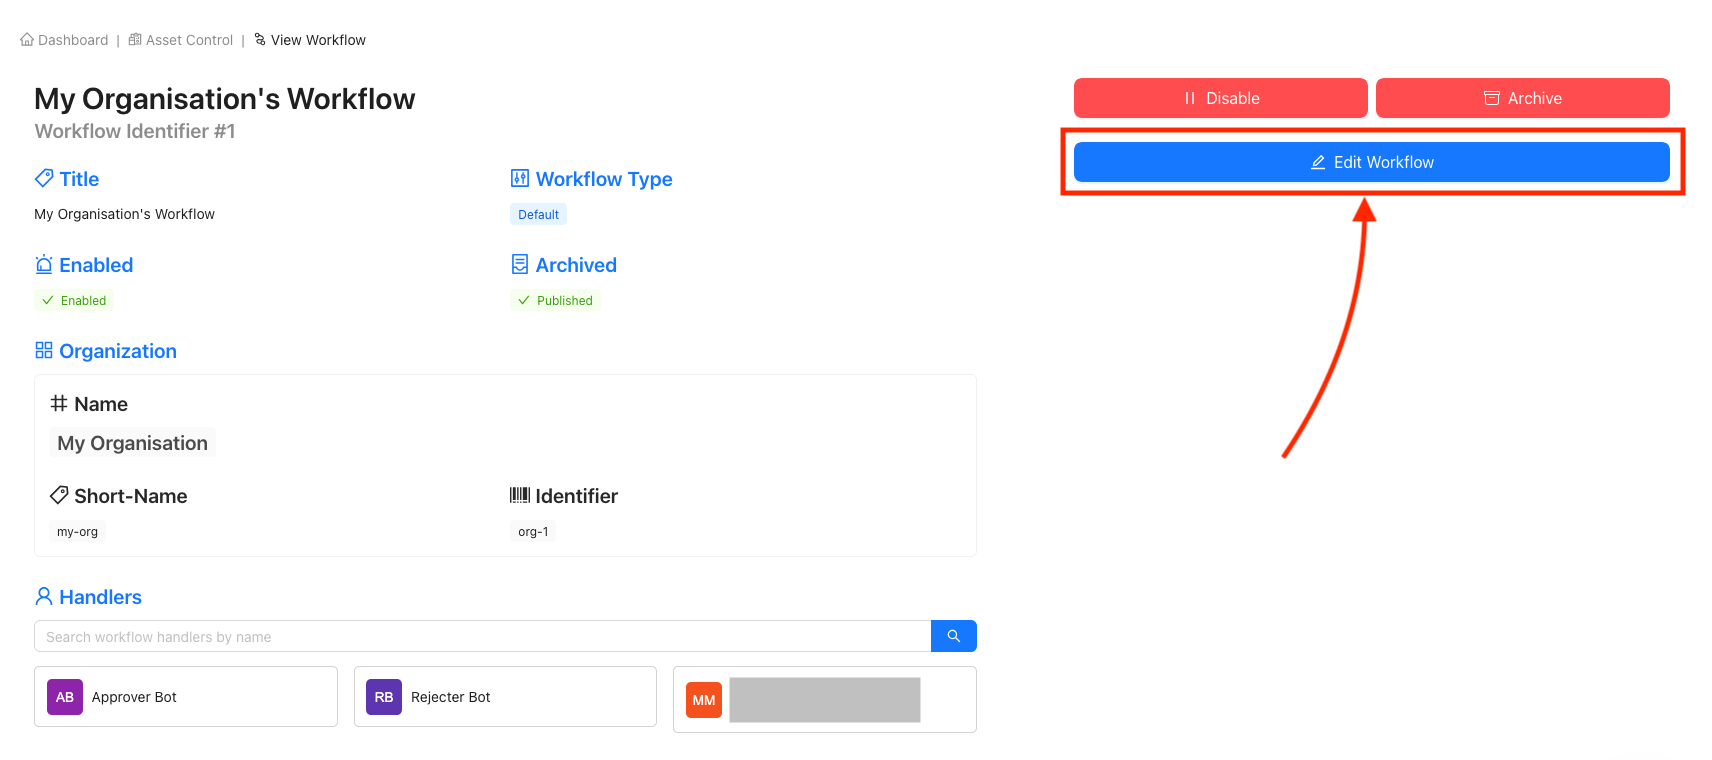
Begin editing a workflow
Once on the desired Workflow's page, click the 'Edit' button on the right-hand side to begin updating Workflow information.
Update workflow details
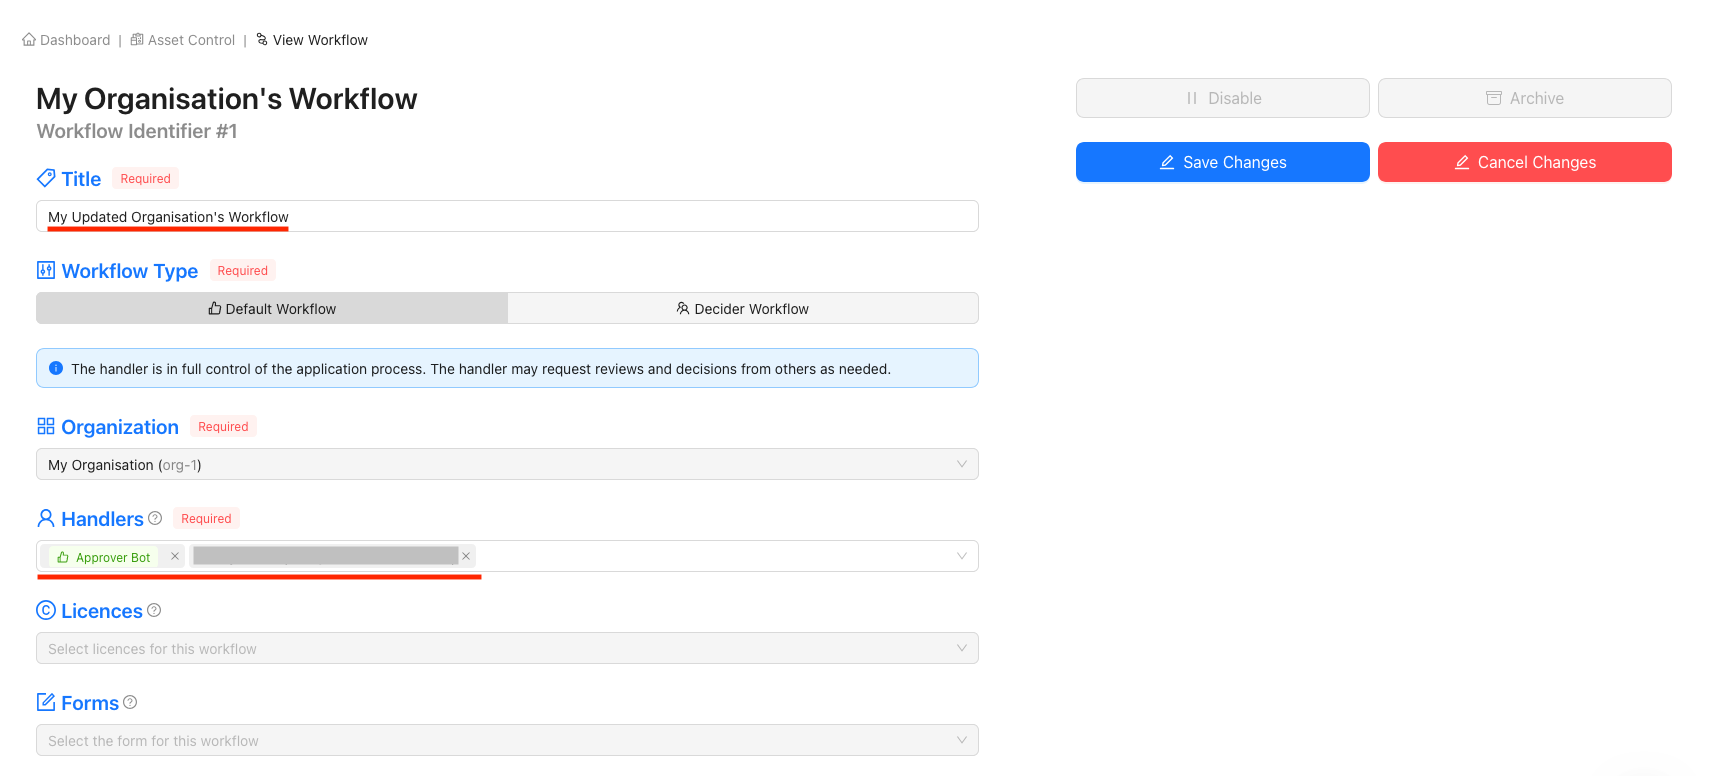
You can update the following elements:
- The Workflow title
- Add or remove handlers
For example:
- Change the name from 'My Organisation's Workflow' to 'My Updated Organisation's Workflow'
- Remove the 'Rejector Bot' as a handler
Finalise workflow updates
Click the 'Save Changes' button to finalise your Workflow updated to reflect your modifications.

