Review Actions
Making a Decision
Warning
Please note that these are general instructions about the approval process. The actual practices may vary depending on the approving organisation.
Furthermore, once you approve or reject the application, the decision is final but you can close or revoke an application afterwards if necessary.
Approve
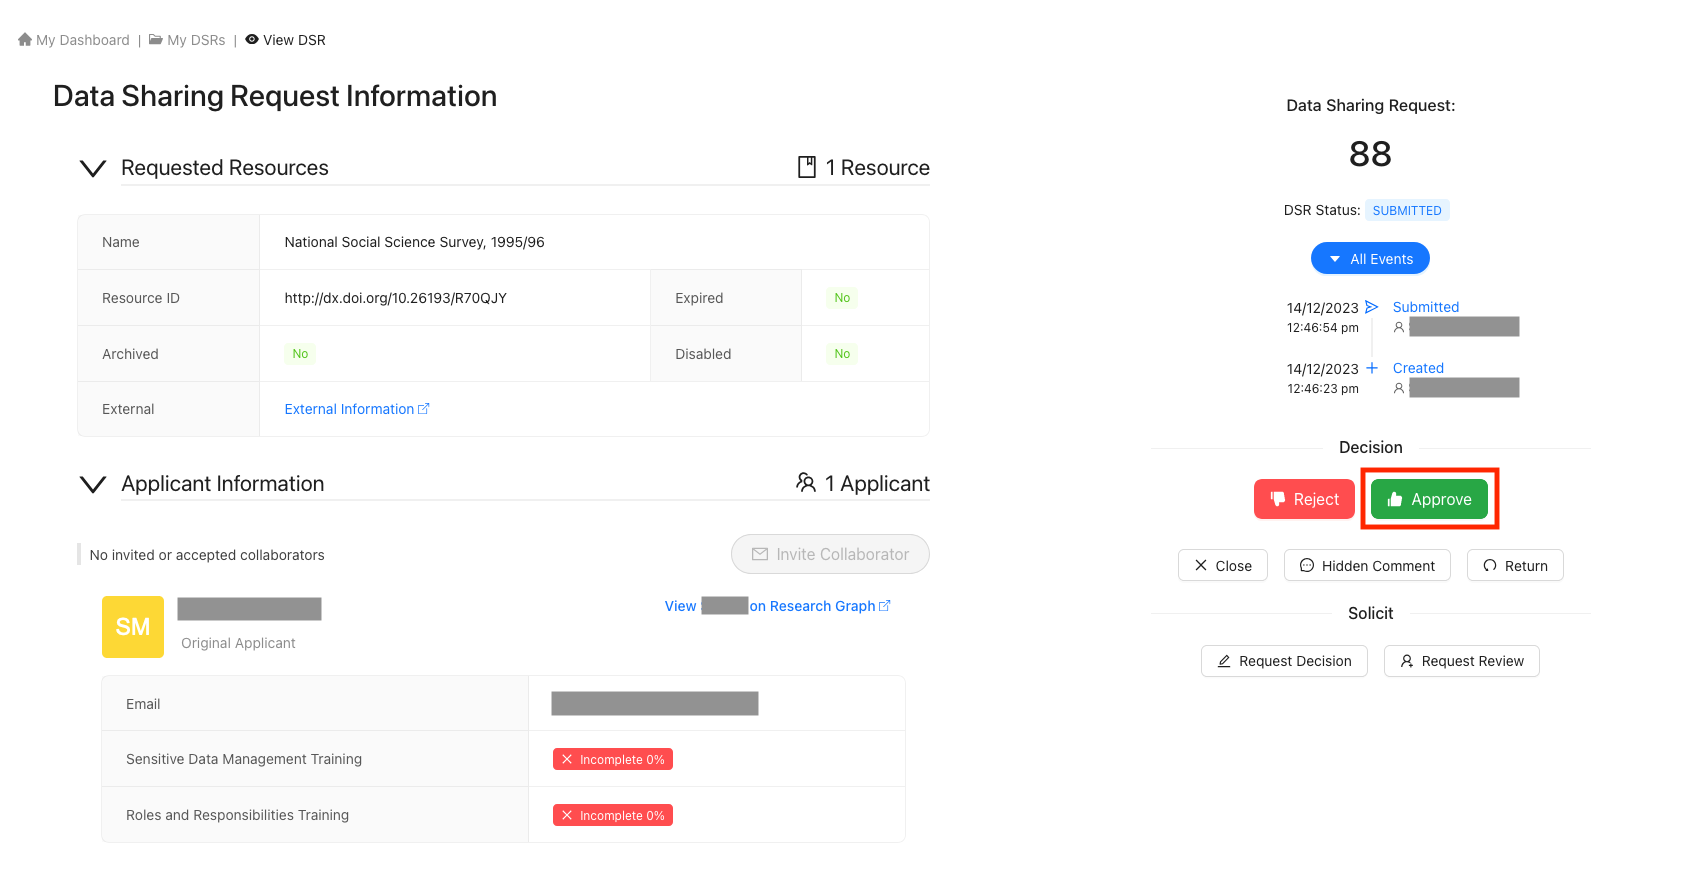
You can approve the application right away if the applicant has provided all the needed information. Once you have, the applicant will receive an email notification about the decision.
Click the 'Approval' button under the Decision actions
Provide approval information
Providing Approval Information is Optional
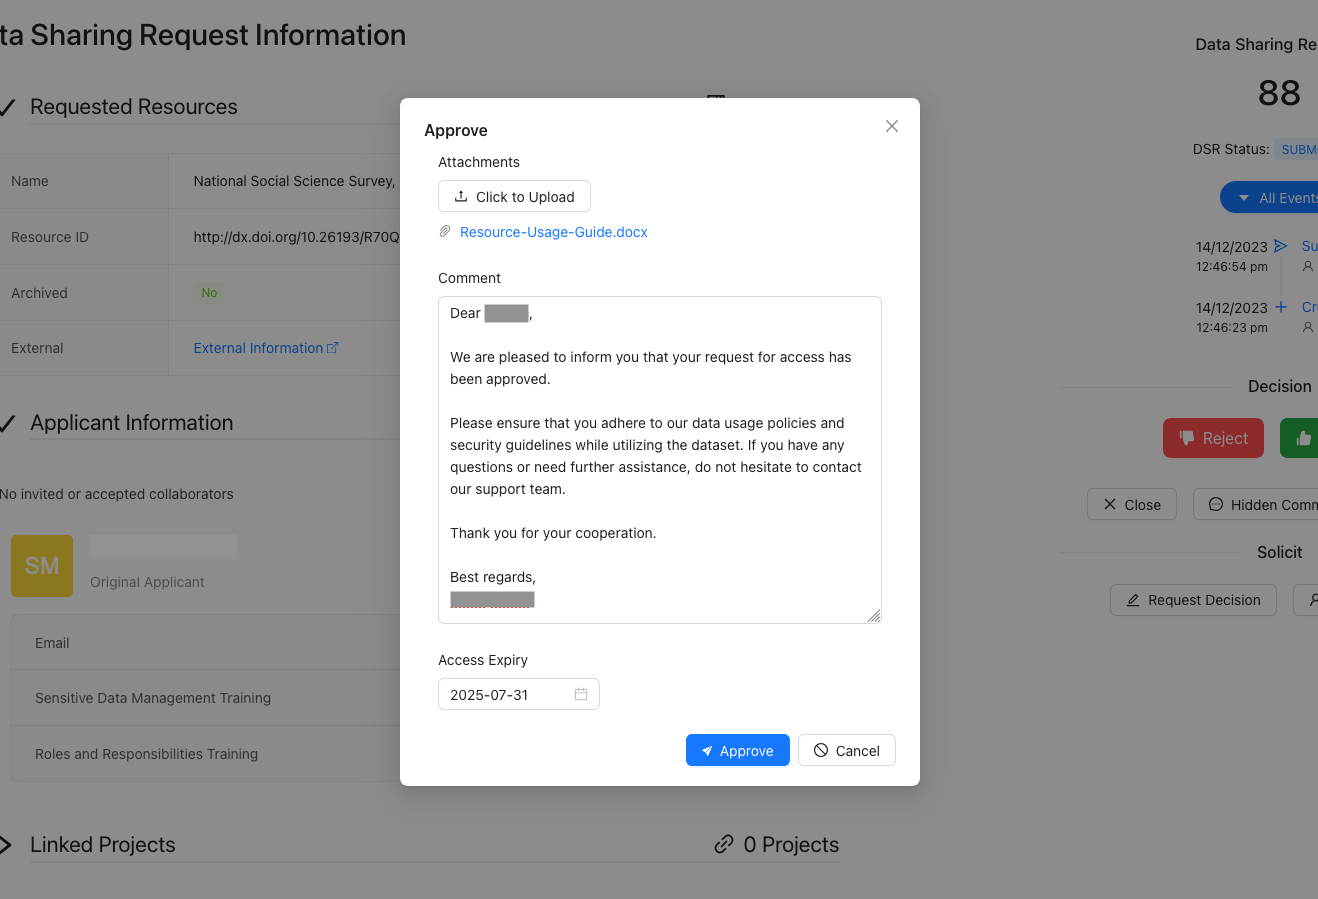
Submit your approval for the user's access
Do all application members get access rights?
To finalise approving a user's DSR, click the 'Approve' button at the bottom of the pop-up.

After successfully processing your approval, you will be navigated back to the 'Review DSR' page.

Reject
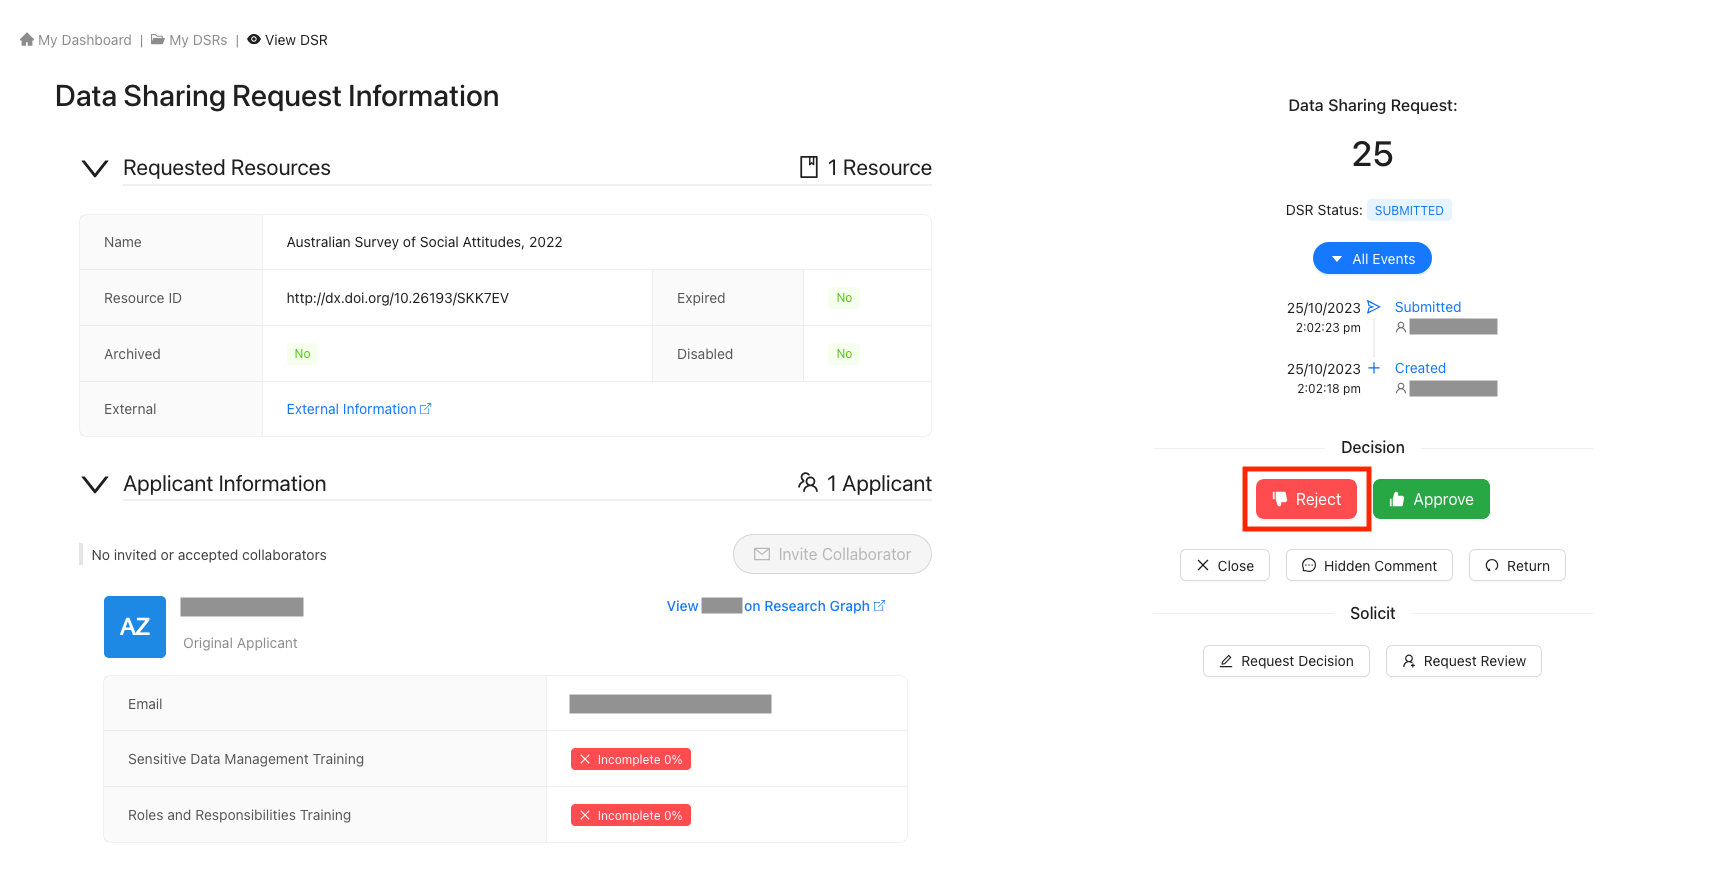
If you reject an application, we recommend telling the applicant why the application was rejected by writing a comment.
Click the 'Reject' button under the Decision actions
Provide rejection information
Providing Rejection Information is Optional
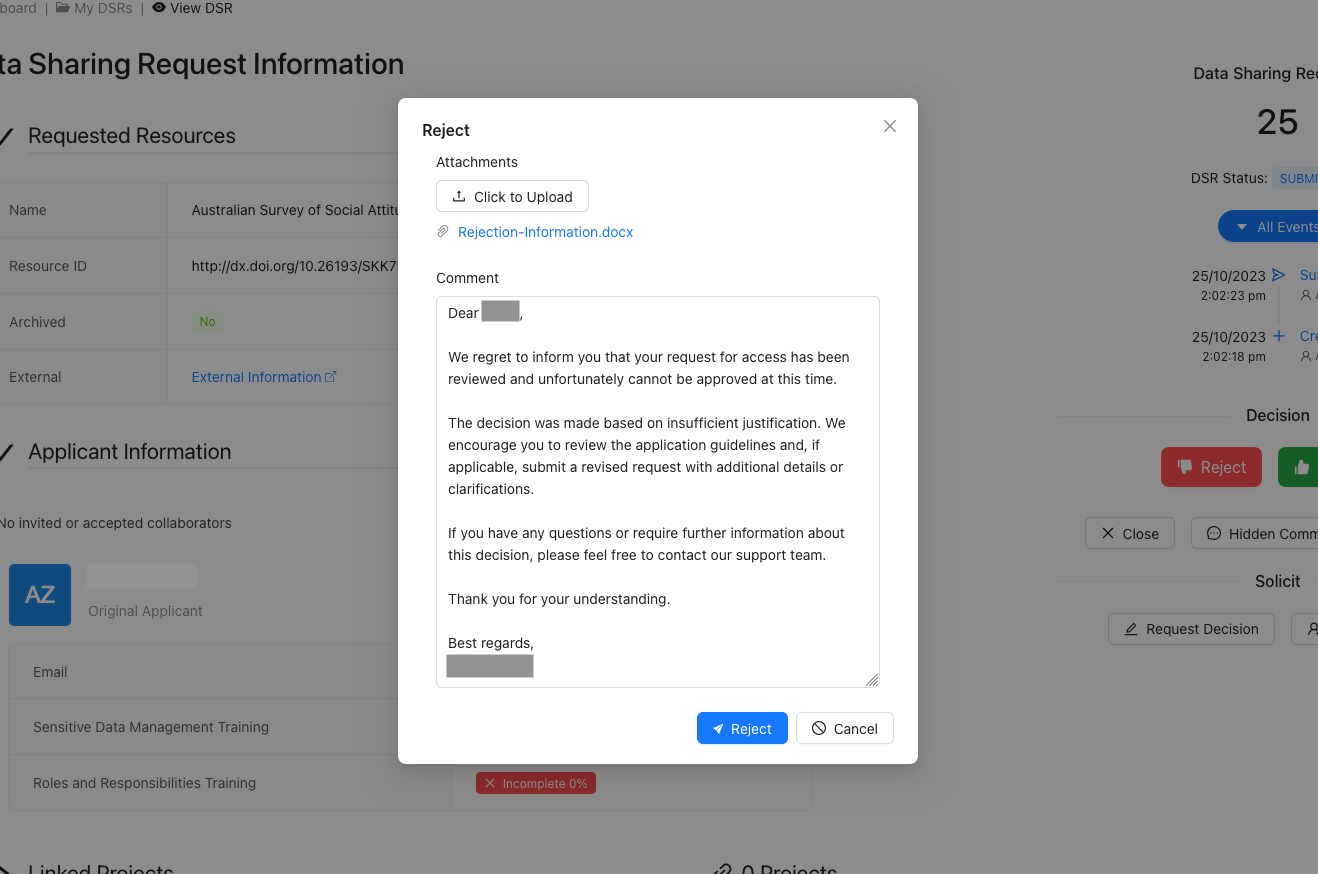
Submit your rejection for the user's access
Warning
If the resource owner has removed the resource applicant is applying for access from use, CADRE will give a warning, but you can still process the application. If the resource has been removed, you will not be able to approve or reject the application.
To finalise rejecting a user's DSR, click the 'Reject' button at the bottom of the pop-up.

After successfully processing your rejection, you will be navigated back to the 'Review DSR' page.

Requesting for a Decision or a Review
A resource owner can modify the approval process so that you have to request another user to make the decision to approve or reject the application. Depending on your organisation's practices, it might be a necessary step to request a decision on an application or request someone else to review an application.
Choose either 'Request Decision' or 'Request Review' under the Solicit actions (as per your needs)
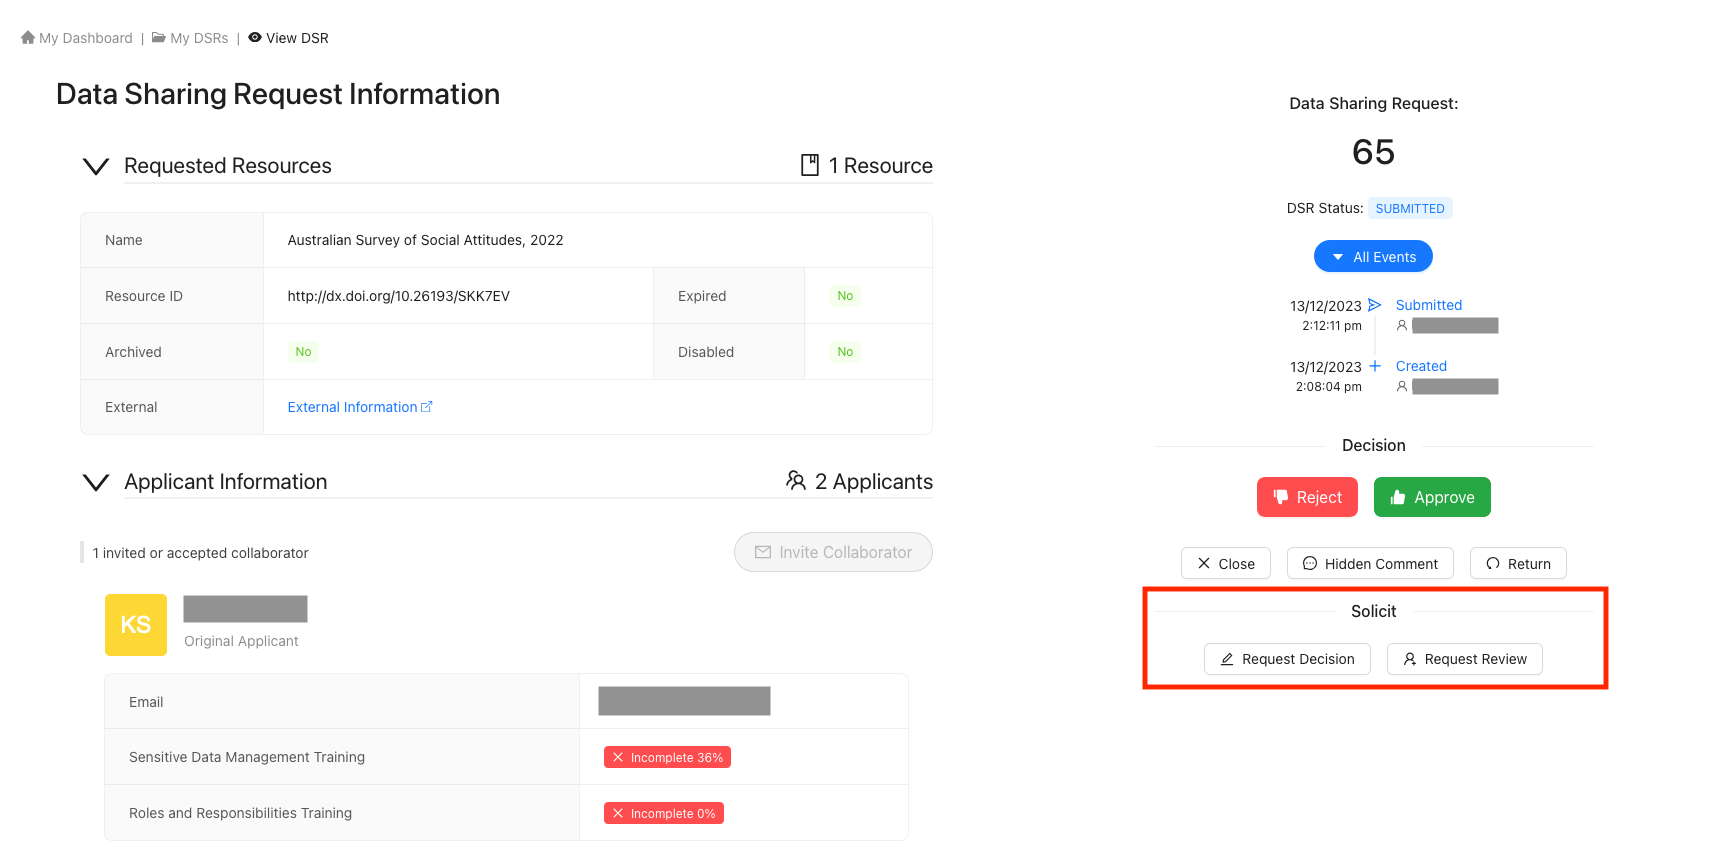
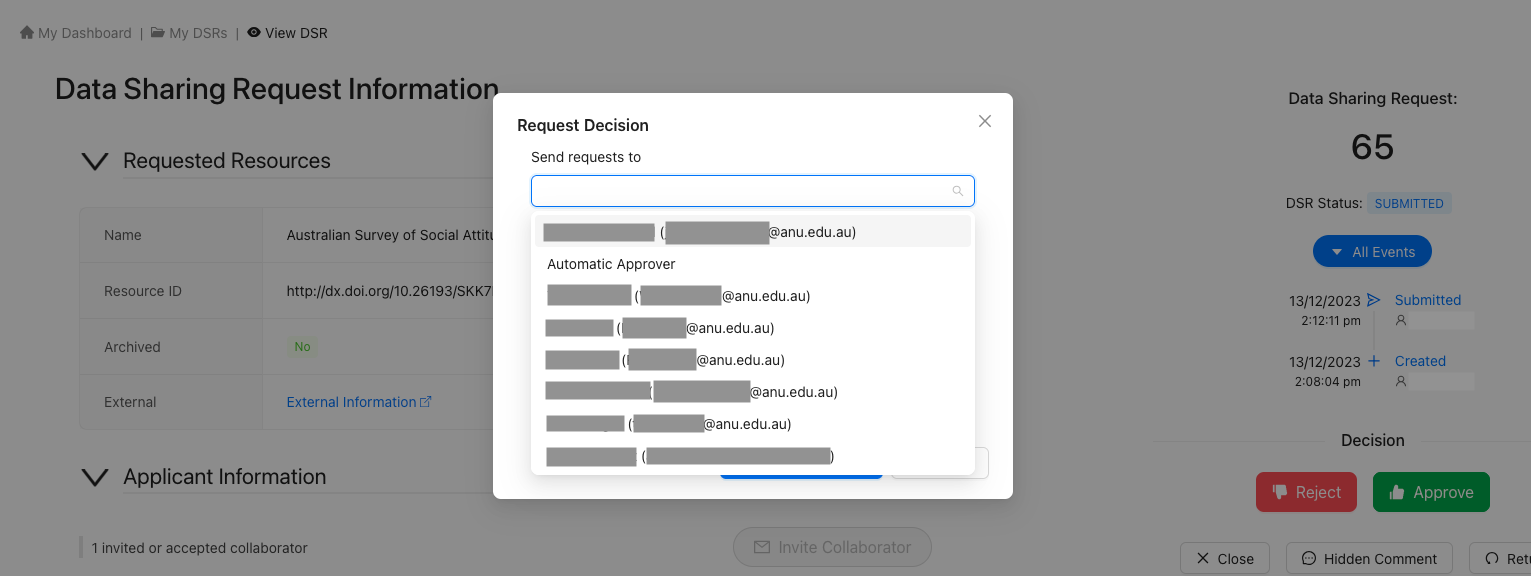
Choose who will be forwarded this request
To request for a decision or a review, locate the user in the drop-down list or use the search function. You can add one or more users.
Provide information about the request being forwarded
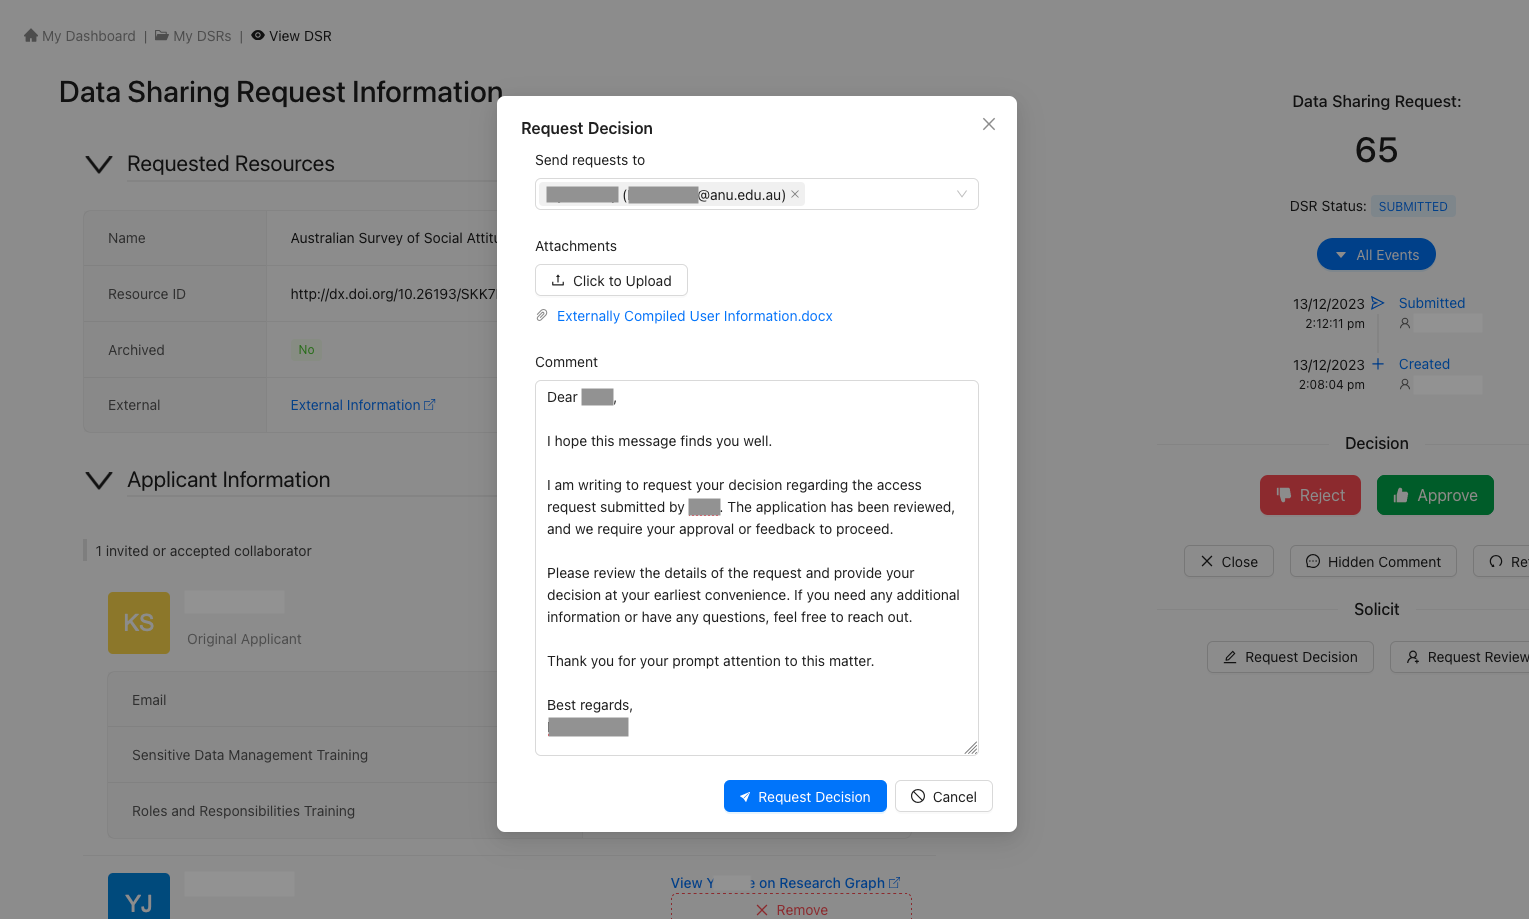
Submit and await for a decision or review

After successfully processing your request to forward the DSR, you will see a success pop-up at the top of the page.

If your forward request included a comment, you will be able to see the forward request information under the 'Communication' section.
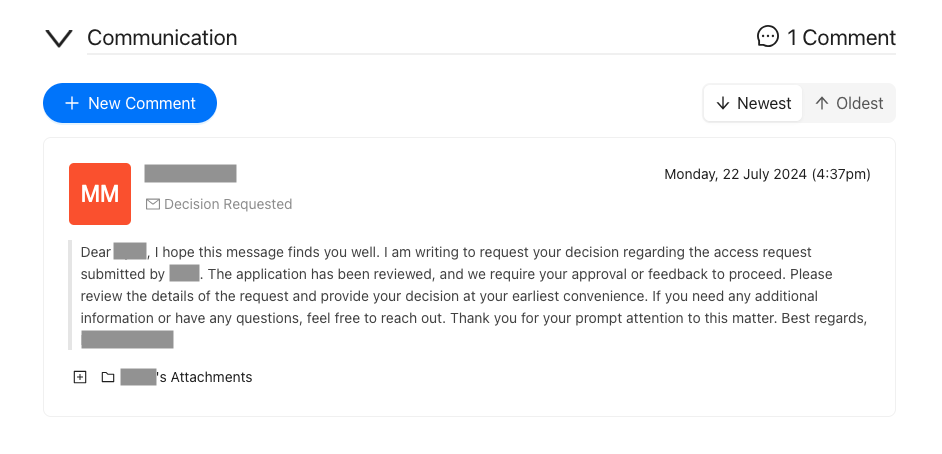
The requested user will receive an email notification about a review or a decision request, and once they have made a decision or they have completed a review, you will receive an email notifying you that they have. If you have permission to, you can still approve or reject the application even if the requested user has not reviewed the application.
Miscellaneous Actions
Closing
You can close an application at any stage of the process by clicking the Close button. Closing means that the application process is cancelled and that the application cannot be modified or opened again but all of the DSR content is still viewable.
Deleting Applications

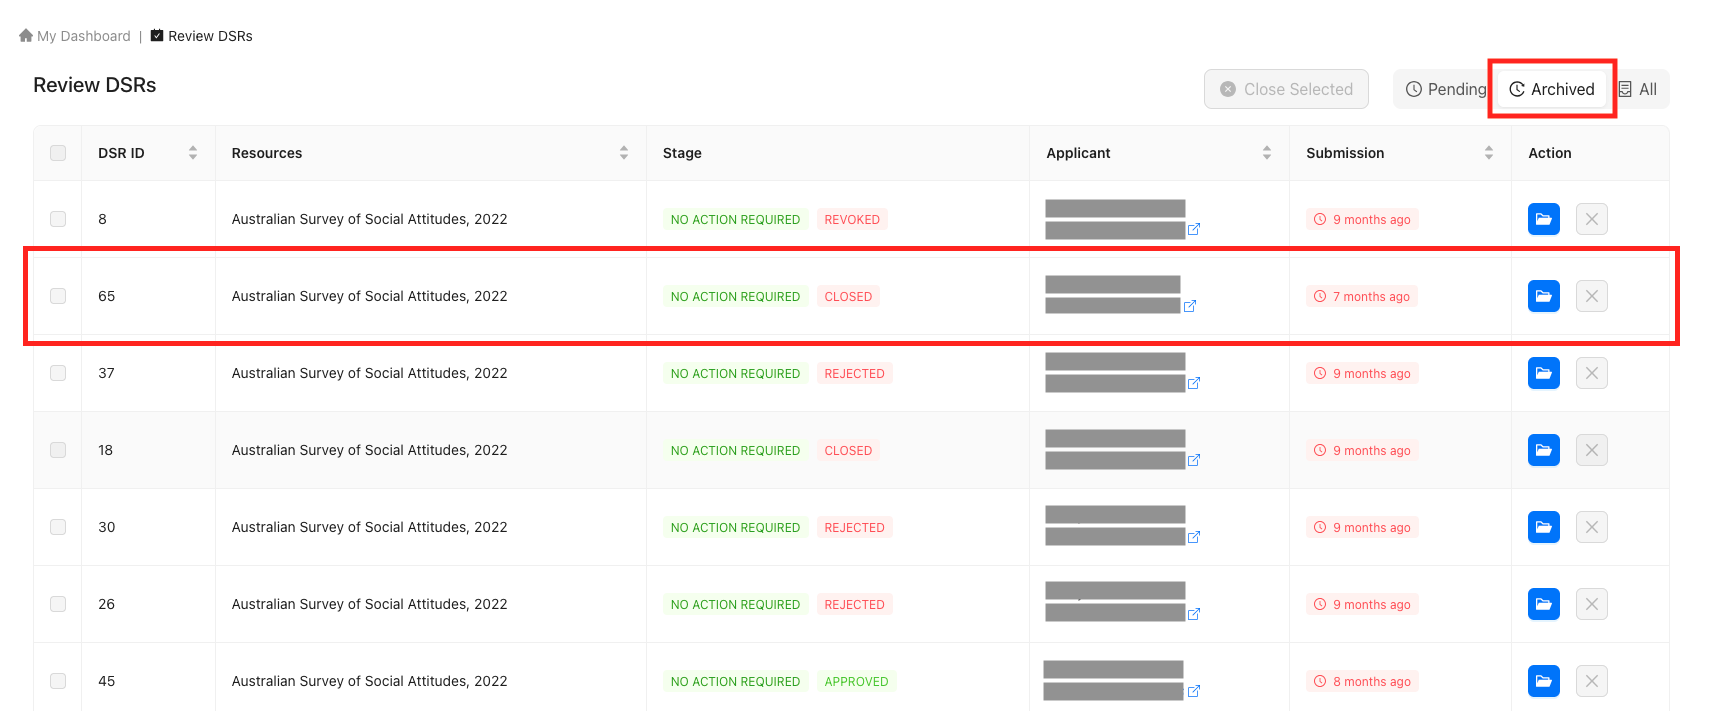
To view closed applications, navigate to the 'Review DSRs' page, and press the 'Archived' option on the segment filter on the top-right hand corner.
Member Removal
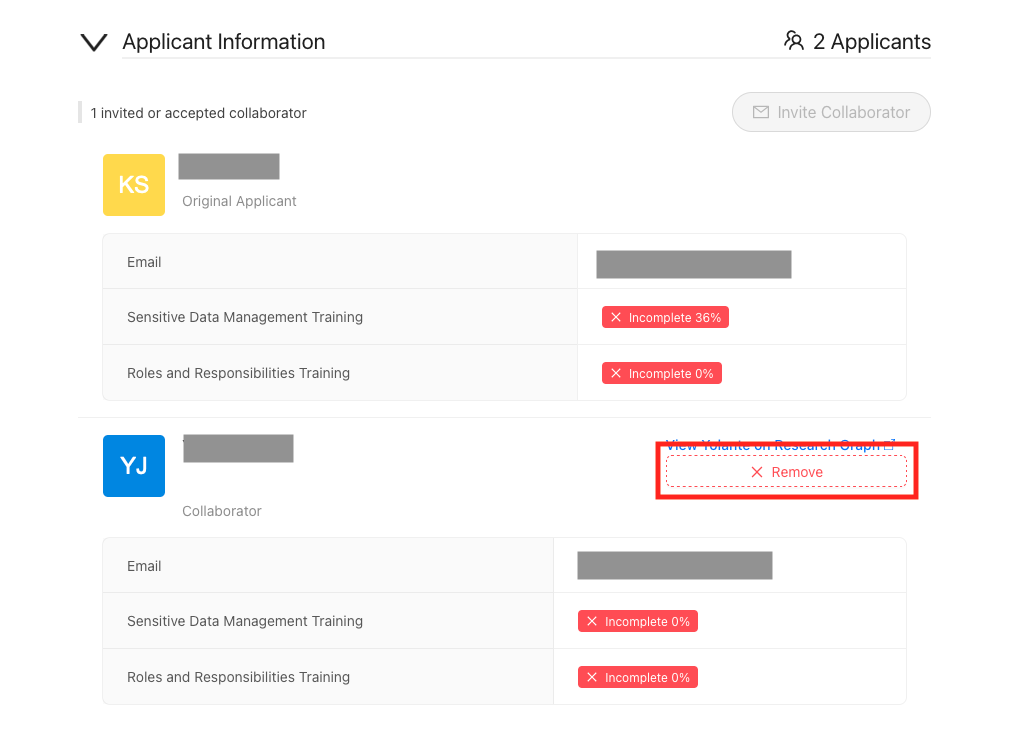
If you do not want to grant access to all the members in the application, you can remove additional members. Approvers may remove members from an application within an access management system for several key reasons:
- Inadequate Justification: If a member's need for access is not clearly justified or their role does not require access to the requested data.
- Non-Compliance: If a member does not comply with data usage policies, security protocols, or ethical guidelines.
- Change in Role: If a member's role within the organization changes, making their access to the dataset unnecessary or inappropriate.
- Data Sensitivity: To protect sensitive or confidential information from being accessed by individuals who do not have a legitimate need for it.
- Resource Optimization: To ensure that only those who truly need access to the data for their work are granted permissions, thereby optimizing resource use and maintaining system efficiency.
Commenting
Public Comments
Sometimes it is useful for the applicant to see the comment from an approver so that they know how the approval process is proceeding. Applicants themselves may comment on an application to ask about it's progress and you may need to reply to them. In cases like these, an approver should leave a public comment, and to do so, follow the steps below:
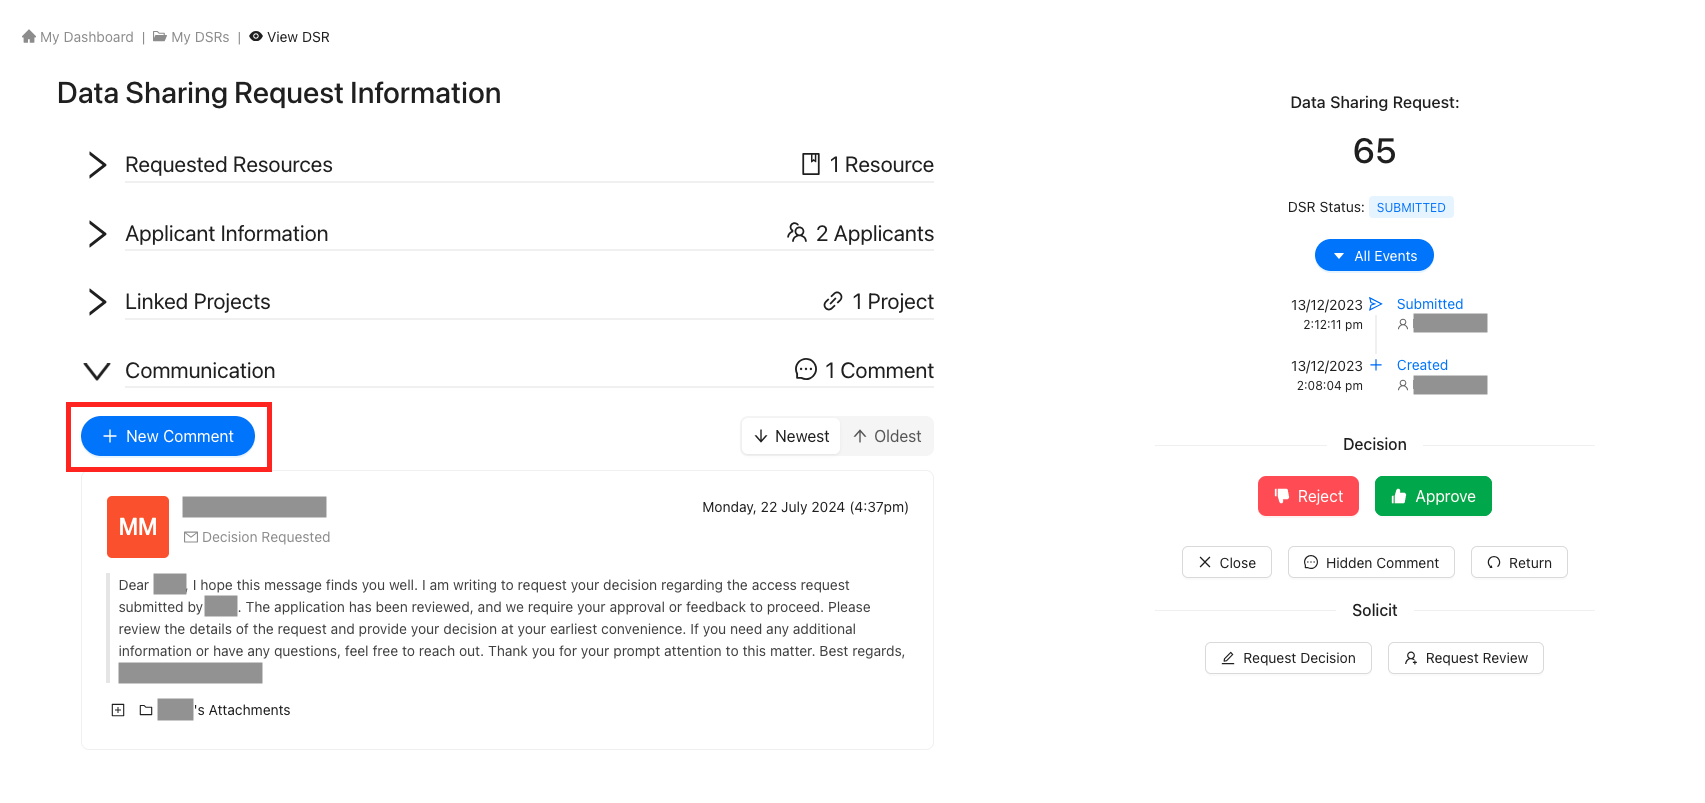
Click the 'New Comment' button within the 'Communication' section
Provide comment information
Providing Attachments is Optional
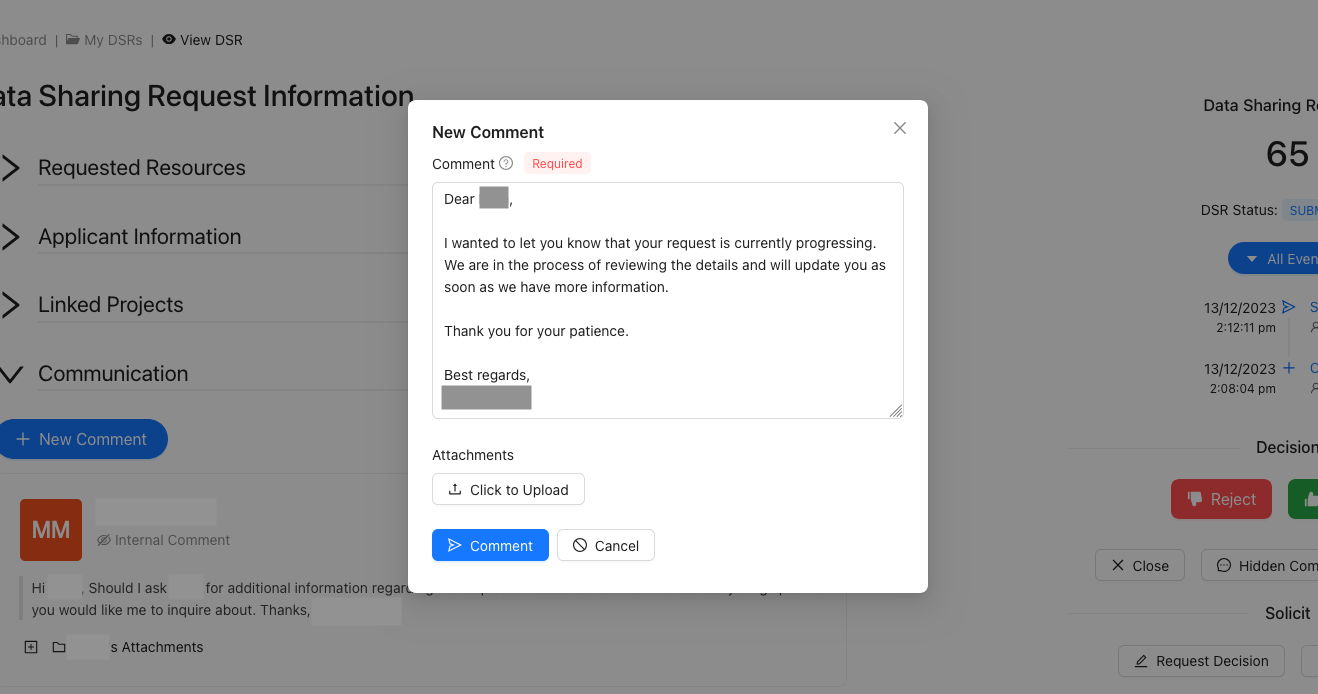
Submit the comment

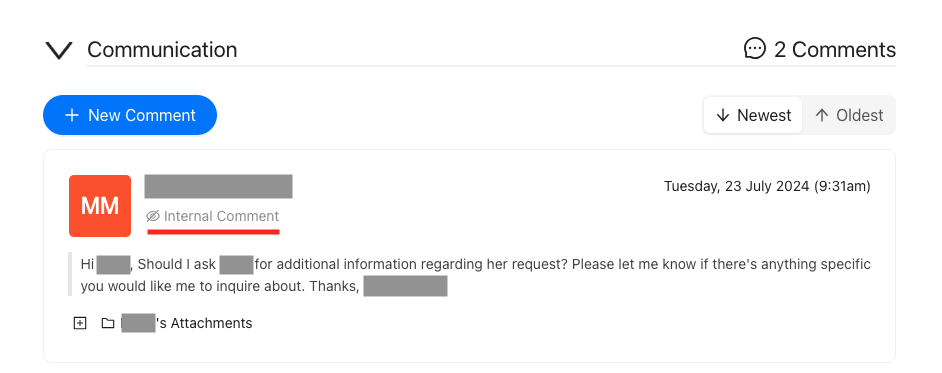
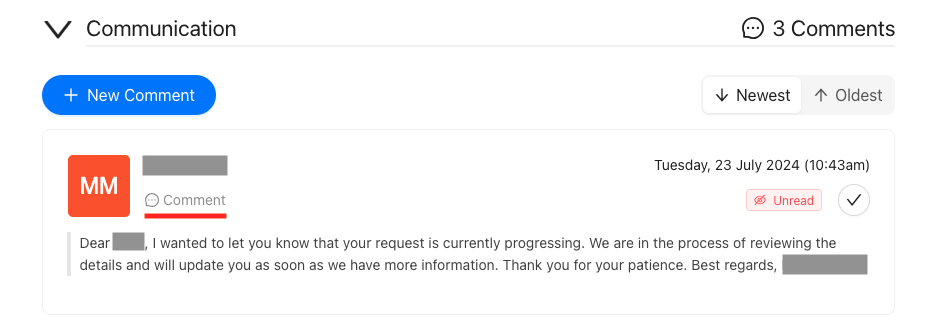
Your comment will now be visible under the 'Communication' section and you can confirm that the comment is visible to the applicants because of the 'Comment' subtitle. If it was a hidden comment, it would have the subtitle 'Internal Comment' instead.
Internal Comments
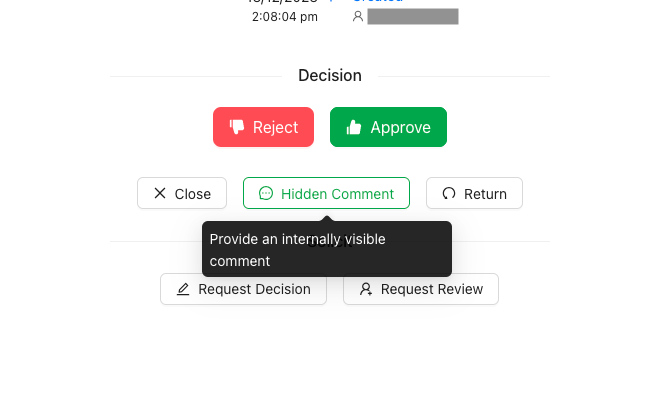
Internal comments allow for approvers, reviewers and deciders to all communicate with each other within the given application without the applicants being able to see the conversation. Follow the steps below to create a internal comment:
Click the 'Hidden Comment' button
Provide comment information
Providing Attachments is Optional
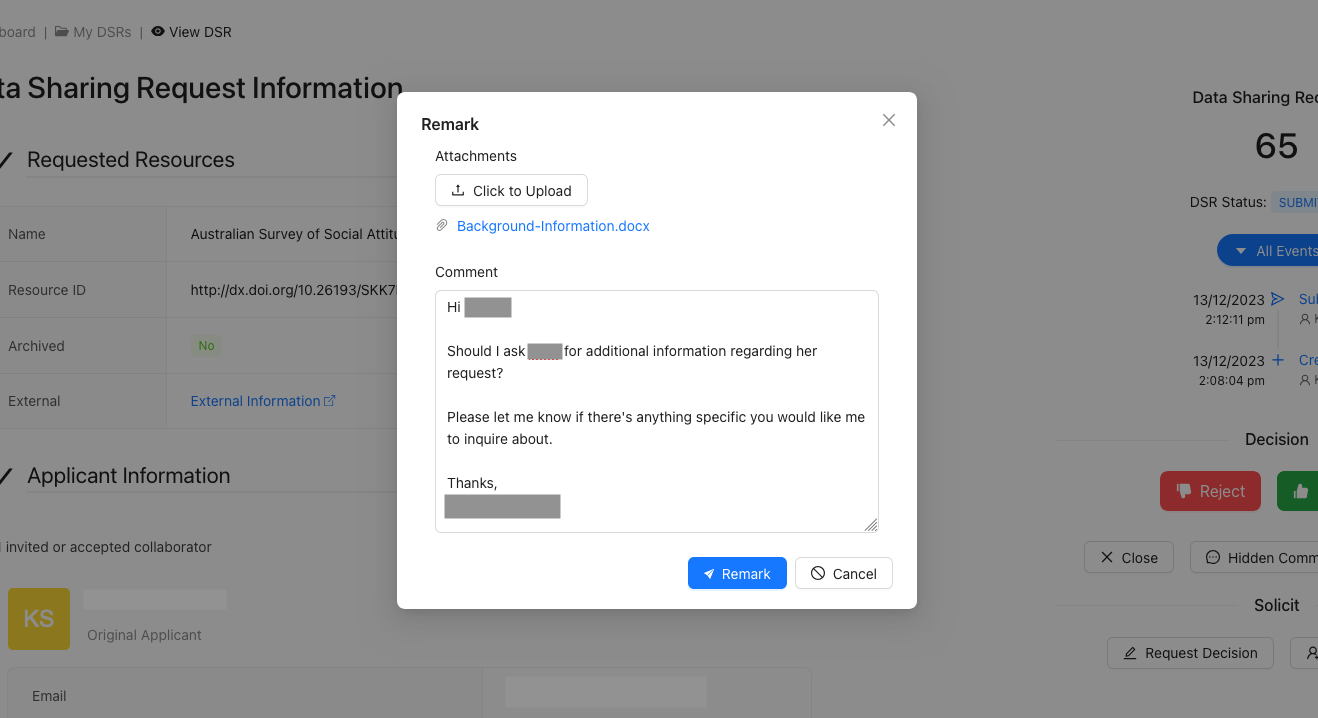
Submit the 'Internal Comment'

After successfully processing your internal comment, you will see a success pop-up at the top of the page.
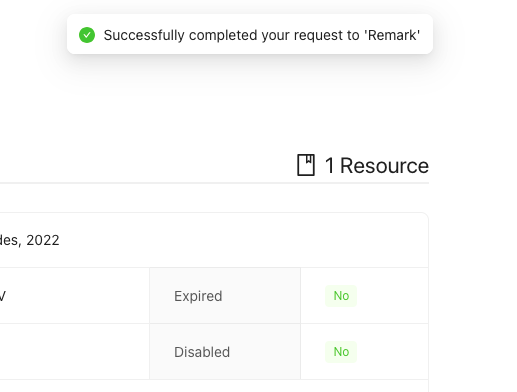
Your comment will now be visible under the 'Communication' section and you can confirm that the comment is hidden to the applicants because of the 'Internal Comment' subtitle.
